51 Data Backup Recovery Icons Set: A Practical Guide for Secure Storage Visuals
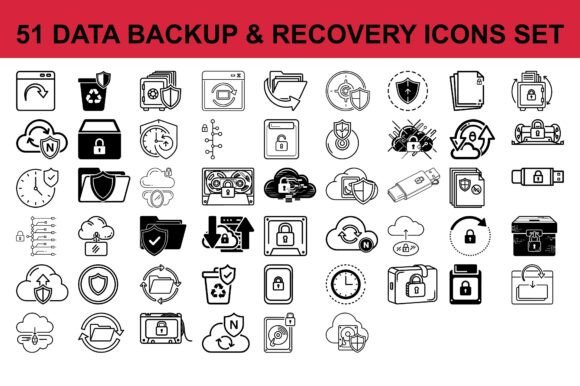
When you build dashboards, tutorials, or cybersecurity content, the right icons do more than decorate. They guide the user, clarify complex ideas, and speed up comprehension. The 51 Data Backup Recovery Icons Set is a vector collection designed to illustrate essential concepts of secure storage and data protection. It includes secure servers, shields, folders, cloud storage, time-lock symbols, recycle bins, restoration tools, synchronization elements, and more—each with clean lines and a modern tech aesthetic. This article explains how to integrate this icon set into your real workflows, whether you are preparing a presentation, designing a UI, or creating training materials. We focus on practical implementation, preparation, and long-term value.
What the Set Contains and Why It Matters for Your Workflow
The set delivers 51 icons in AI, EPS, and high-resolution JPG formats. That means you have fully editable vector files for scaling and customization, plus raster versions for instant use. The icons cover the full spectrum of backup and recovery: from source storage (folders, servers, cloud) to protective measures (shields, locks, timers) to restorative actions (recycle bins, restore arrows, sync cycles). This breadth matters because a single project often requires representing multiple stages—initial backup, scheduled protection, error recovery, and successful restoration. Instead of mixing icon styles from different sets, you maintain visual consistency across all touchpoints.
Preparing for Your Project: Choose the Right Format
Before you start designing, consider your output medium. If you are building a web app or responsive dashboard, the vector AI/EPS files allow you to export SVG or PNG at any size without pixelation. For print materials like posters or worksheets, the high-res JPGs (typically 300 dpi) are print-ready. Keep both formats organized in folders named by use case—for example, “web_ui_icons” and “print_handouts.” This preparation saves time when you need to quickly grab an icon for a last-minute revision.
Using the Icons Before, During, and After a Project
The set fits naturally into three phases of any content or design workflow.
Before You Start: Planning Your Visual Language
In the early stages, you define the look and feel of your interface or document. Open the AI file and review the entire icon library. Note which icons align with your core concepts. For instance, if you are creating a data protection guide, you might map “shield” to security layers, “lock with timer” to scheduled backups, and “cloud arrow” to off-site storage. Make a legend of icon meanings—this will keep your messaging consistent as you build pages or slides.
You can also group icons by category: storage (servers, clouds, disks), actions (upload, sync, restore), and status (success, warning, lock). This categorization helps when you later need to place icons in a navigation bar or a step-by-step tutorial. Preparation also includes checking color compatibility. The icons come with clean line strokes, but if your brand uses a specific palette, you can recolor them in Illustrator or Affinity Designer because they are vector.
During Execution: Integrating Icons into Real Projects
Now you start building. Below are concrete ways to embed the icons into common deliverables.
UI/UX Dashboards and Software Interfaces
For a dashboard that tracks backup health, use the server icon to represent main storage, the sync icon for ongoing replication, and the recycle bin for deleted items. Place these in a sidebar or as section headers. Because the icons share a balanced style, the interface feels cohesive. Add tooltips or labels next to each icon to reduce ambiguity. For interactive elements, you can export each icon as an SVG and embed it directly in your code. The editable vector format lets you adjust stroke weight or add hover states without redrawing.
IT Service Branding and Websites
If you manage a website for a managed service provider, the 51 Data Backup Recovery Icons Set can illustrate service pages. Use the shield icon next to “Data Protection Plans,” the cloud icon for “Cloud Backup,” and the timer lock for “Automated Retention.” This replaces generic stock photos with precise visual cues that clients immediately understand. For the hero section of a landing page, combine two or three icons in a visually balanced row. Keep the design simple—icons work best when they are the focal point, not crowded by text.
Technical Documentation and Tutorials
Tutorials often walk users through steps like “connect to server,” “select folder,” “start backup,” and “verify restore.” Each step can have its own icon. For example, use the folder icon for selection, the upload arrow for backup, and the checkmark within a circle for verification. This reduces the amount of explanatory text needed, especially for non-native speakers. When exporting the tutorial as a PDF, use the high-res JPGs to ensure clarity on screen and in print.
Cybersecurity Infographics and Reports
Infographics tell a story with data. Use the time-lock icon to represent retention policies, the shield for encryption layers, and the sync arrows for continuity. Build a flowchart that shows data moving from local server to cloud, protected by shields and monitored by an eye icon. The consistent line style of the set prevents visual noise. If you need to annotate, place the icon in a circle or square container—many icons are self-contained shapes, so they frame well.
After Completion: Reviewing for Consistency and Quality
When your project is finished, run a final review. Check that every icon you used matches the same set—mixing icons from different sources breaks visual unity. Verify that scaling didn’t introduce aliasing (vectors should stay crisp). If you used the JPGs, ensure the resolution remains clear on the output medium. For printed materials, print a test sheet; for digital, zoom to 200%. Replace any blurry icons by re-exporting from the vector source.
Organizing and Managing the Icon Set for Long-Term Use
Over time, you will reuse these icons across multiple projects. A little organization now saves hours later.
Build an Asset Library
Create a master folder on your cloud storage or local drive. Inside, place subfolders: “AI_Source,” “EPS_Source,” “JPG_HighRes,” and “Web_SVG”. In the SVG folder, export each icon individually with a descriptive filename (e.g., “server-icon.svg”, “cloud-backup.svg”). Add a text file with a brief description of each icon’s intended meaning. If you use design tools like Figma or Sketch, import the vector files as components so you can drag them into any project instantly.
Use a Color Palette Tweak
The set ships with neutral lines, but you can create color variants—blue for storage, green for success, orange for warnings, red for errors. Save each variant as a separate file or use a design app’s color swap feature. This turns the 51 icons into a much larger library without extra work.
Plan for Future Updates
As your brand evolves, you might want to refine the icons. Because you have editable vectors, you can adjust stroke thickness, add rounded corners, or incorporate your company logo shape. Keep the original files unchanged in an “archive” folder and work from copies. This ensures you always have a fallback if the customization goes wrong.
Practical Implementation Tips
- Stay within the set – For a single project, do not mix these icons with icons from other sets. The difference in stroke width or corner radius will be noticeable to users.
- Test readability at small sizes – If you plan to use icons in a mobile dashboard, test them at 24×24 pixels. The clean lines of this set usually hold up well, but you may need to simplify some icons (e.g., remove internal detail) for very small displays.
- Combine with text labels – While icons are intuitive, adding a short label (one or two words) next to each one eliminates guesswork. This is especially important in technical documentation where precision matters.
- Leverage the time-lock and sync icons for scheduling – In a training module, use the time-lock icon to represent automatic backup schedules and the sync icon for real-time replication. These two icons together can illustrate a full backup policy without long paragraphs.
- Use the recycle bin for deletion warnings – In a software interface, the recycle bin icon signals a delete action. Pair it with a shield or a warning triangle to indicate irreversible deletion. This prevents accidental data loss.
Interactions with Other Tools and Platforms
The vector formats (AI and EPS) work with Adobe Illustrator, CorelDRAW, Affinity Designer, and Inkscape. If you use presentation software like PowerPoint or Google Slides, you can import the icons as images or, better, convert them to SVG and insert them as scalable objects. For web development, convert to SVG and optimize with tools like SVGO to reduce file size. If you are building a printable worksheet in Canva, upload the high-res JPGs directly—the resolution will be sufficient for A4 or letter size.
The icons also integrate with documentation platforms like Confluence, Notion, or Read the Docs. Upload the JPG or SVG versions to your media library and embed them inline. Because they are a single set, your documentation will have a uniform appearance across pages, reinforcing brand trust.
Efficiency and Quality Control Considerations
Using a cohesive icon set reduces the time spent hunting for graphics. When you have all 51 icons at your fingertips, you avoid searching through random icon sites that may have inconsistent styles. Quality control becomes simpler: you only need to review one source file. Before finalizing any project, run a quick checklist:
- Are all icons from the same set?
- Do they have consistent stroke weights and corner styles?
- Are they correctly aligned with adjacent text or UI elements?
- Are the colors (if changed) harmonious and accessible?
- Is the resolution adequate for the output medium?
This set is designed to be plug-and-play. If you follow these checks, you minimize rework and ensure that your data backup visuals communicate reliability and clarity.
Long-Term Value for Professionals and Creators
For IT professionals, the icons become a reusable resource for client proposals, internal documentation, and training videos. For marketers, they add a professional touch to landing pages and social media graphics about data security. For educators, they make abstract concepts like encryption and off-site backup concrete. The fact that the set includes both vector and high-res raster formats means it can serve both digital and print campaigns for years. As new projects arise—whether it is a software update, a new compliance guide, or a rebranding effort—you can adapt the same icons without starting from scratch.
By investing a little time upfront to organize the icons and match them to your messaging, you gain a visual system that speeds up your work and builds trust with your audience. Data backup and recovery are inherently serious topics; clear, professional icons help your users feel confident that they understand the process. The 51 Data Backup Recovery Icons Set gives you the tools to create that clarity across every project.